Step 1: Work some magic
“Contouring can be very technical but the basic theory is that you want to use dark, matte shades on areas you want to recede and absorb light, such as the sides of the nose and pockets of the cheeks, and light, shimmery shades on those you want to bring forward and reflect light, like the tops of the cheeks.”
Step 2: Get the right kit
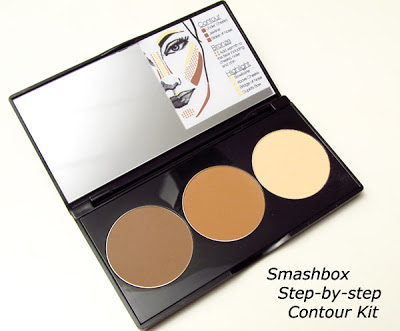
“I like contouring kits, since they have all the shades you need right there and some, like Smashbox’s Step-By-Step, have application instructions inside, too.”
Step 3: Learn the dark arts
“With the darkest color in the kit, I sculpt under the height of the cheekbones and diagonally down toward the jawline using a small round brush and feathering the edges. This deepens the hollows of the cheeks, creating the illusion of depth there. You can also do the sides of your nose for a slimmer shape.”
Step 4: Play with dimension
“I sweep the medium color over the tops of the apples and into the hollows of the cheeks, feathering it away toward the corner of the mouth. I also go around the hair line under the jawline to define the face, and make it more three-dimensional.”
Step 5: Catch the light
“I use the lightest color on top of the cheekbones then swoop it underneath the eyes and gently on top of the brow bone. You can also do the bridge of the nose and just the top of the chin in a small circle to bring the face forward.”
Step 6: Don't forget blush
“Lastly, I like to add a little color to the face to bring it to life. I’ll usually go for a pretty pink blush and apply it a little bit further back than the apples of the cheeks. It’s a simple trick that adds more dimension, and you’re done.”
Info with the help of Harper Bazar
Need more tips? e-mail fashionlovesinspiration@gmail.com


No comments:
Post a Comment